How do I make sure tenants can figure out the mirror controls on day one?
A bathroom mirror can be one of the most noticeable upgrades in a rental property—and one of the easiest to make frustrating. If a tenant has to tap every corner, hunt for a hidden switch or guess whether the mirror is meant to demist, change colour or simply turn on, the installation has missed an important brief.
The goal is straightforward: give tenants a mirror with a simple mirror interface, make the controls easy to find, and leave clear handover notes. That doesn’t necessarily mean replacing the whole bathroom. In many rental properties, the best result comes from keeping the layout, avoiding unnecessary plumbing and tiling work, and investing in lighting that makes the room more useful every day.
Start with the tenant’s experience, not the product specification
Mirror listings often highlight features such as colour-temperature adjustment, dimming, touch controls, demisting pads and built-in clocks. Those features can be useful, but more options don’t automatically make a better rental bathroom. Each one adds another thing a tenant may need to discover, operate or troubleshoot.
Before choosing a mirror, picture a tenant using the bathroom on their first morning. They may be unfamiliar with the property, in a hurry, and unlikely to read a long manual. Ideally, they can work out the basics at a glance:
- Where to turn the mirror light on and off.
- Whether the control is a touch button, pull cord, wall switch or movement sensor.
- How to adjust brightness or colour, if those functions are included.
- Whether the demister comes on with the light or has a separate control.
- What to do if a feature doesn’t respond.
If a function is unlikely to be used, consider whether it needs to be included. A dependable light with one obvious control may be more tenant-friendly than a mirror with several small icons and settings that reset whenever the power is switched off.
Decide: refresh or full renovation?
The right mirror project depends on the condition of the bathroom and the work already planned. A mirror upgrade is often a good opportunity to improve the room without turning a modest refresh into a full refurbishment.
A refresh may be enough when… A full renovation may make sense when… The existing layout works and the basin, bath or shower are in sound condition. There are persistent leaks, failed waterproofing or significant damage. The main issues are poor lighting, dated finishes or a mirror that is too small. Fixtures are at the end of their useful life or the bathroom is difficult to clean and maintain. You can improve usability without moving plumbing or disturbing large areas of tile. The current layout genuinely prevents practical use or required repairs involve opening up the room.In a rental, a refresh can be the sensible choice when the room is fundamentally functional. Keep the basin, shower and other plumbing in place if they work. Moving them can increase labour, create tile-matching problems and extend the time the property is out of use. A well-sized illuminated mirror, refreshed sealant and a tidy redecoration may deliver a more noticeable improvement for less disruption.
Take the broader maintenance picture into account, too. If the bathroom already needs substantial remedial work, it may be more efficient to coordinate the mirror installation with that job. But don’t let a mirror purchase become a reason to replace sound fixtures or retile a serviceable room without a clear benefit.
Make mirror lighting the high-impact upgrade
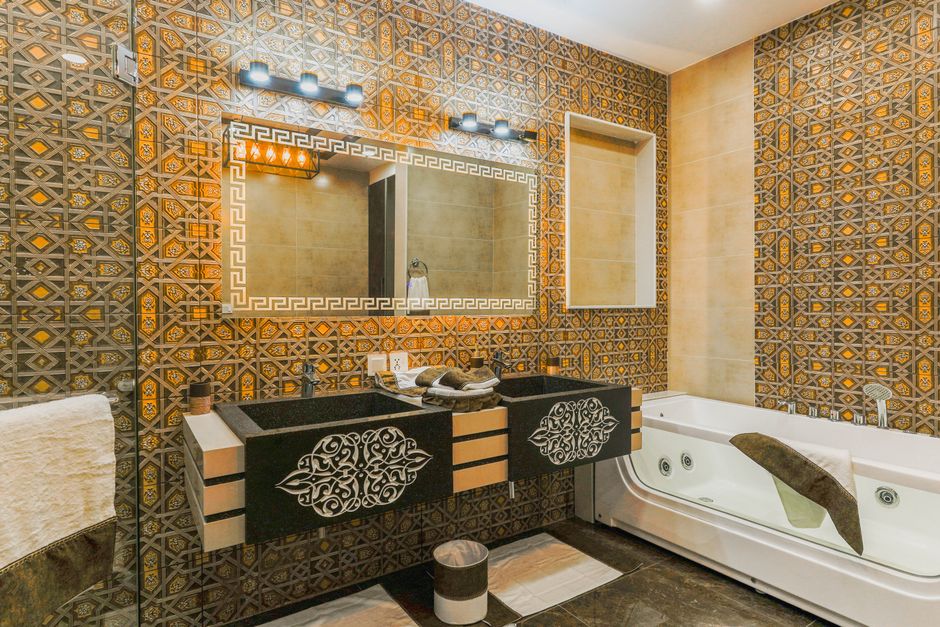
Lighting affects how the bathroom feels and how easily tenants can use it. A mirror light can improve everyday tasks such as shaving, applying make-up and getting ready for work. It can also make a compact bathroom feel brighter without changing its footprint.
Check how the mirror lighting will work with the existing ceiling light. A mirror that provides flattering, useful light at face level can complement general lighting; it shouldn’t be expected to solve every lighting problem in a dark room. Consider the mirror’s position, the size of the basin and whether the light will be blocked by a shelf, cabinet or projecting fitting.
Choose features for a reason
Decide which functions genuinely help your tenants. Dimming can be useful if the light is bright for night-time visits. A demister may be valuable in a bathroom that regularly steams up. Adjustable colour temperature can suit different preferences, but it should be easy to understand and should not make the mirror inconvenient to use.
For each feature, ask: will a tenant understand it without instructions, and will it behave predictably? If the answer is no, look for a simpler model or plan to explain it clearly at handover. The aim is to avoid confusing features, not to avoid useful ones altogether.
Check fit, position and installation before ordering
A mirror can be technically suitable yet look awkward if it is too wide for the basin or too high for everyday use. Measure the available wall, note the position of the basin and taps, and check for obstacles such as cabinets, sockets, lights and tile edges. Confirm the manufacturer’s installation requirements, including access to the electrical connection and any required clearance.
The LED Mirror World website is a product supplier to consider when comparing illuminated mirrors. Use its mirror size calculator page as one input when working out a suitable size, then check the dimensions against the actual room. A calculator can help narrow down options, but it cannot replace measuring the wall and considering the basin, fittings and sightlines.
Use a paper template to check the outline
Before drilling, make a paper template the same size as the mirror or use joined sheets to mark its full outline. Hold or temporarily fix the template at the proposed height. This simple paper-template method helps you spot problems before they become holes in the wall: the mirror may sit too close to a cabinet, look off-centre above the basin or clash with an existing fitting.

- Measure the mirror’s width and height from the product specification.
- Mark those dimensions on paper, card or taped-together sheets.
- Position the template above the basin and check it from normal standing and seated viewpoints, where relevant.
- Confirm that it clears nearby fittings and that the installer can access the fixing points and electrical connection.
- Only approve drilling once the position has been checked against the actual product and wall conditions.
This is especially useful when the mirror is being fitted to tiled walls. It can reduce avoidable rework, but it doesn’t determine whether a wall is suitable for the mirror’s weight or fixing method. The installer still needs to assess the substrate and follow the manufacturer’s instructions.
Keep electrical safety and maintenance in the plan
Bathroom electrical work needs to be suitable for the location and the product. Check the mirror’s instructions for its electrical requirements, IP rating and permitted installation zones. Use a suitably qualified electrician to assess the installation, make the connection and advise on applicable requirements, including appropriate circuit protection. Don’t assume that an existing cable or switch is suitable simply because it is already there.
Think about maintenance before the mirror is fixed in place. The chosen model should be accessible for inspection or replacement in line with its instructions. Ask the installer how the mirror is isolated and what should happen if the light, demister or controls stop working. Record the product details and installation information with the property’s maintenance documents.
Make the controls obvious on day one
Good handover notes don’t need to be lengthy. They need to answer the questions a tenant is likely to have, using the same names and symbols they will see on the mirror.
- Point out the control and describe whether it needs a tap, press or hold.
- Explain what each visible button or symbol does in plain language.
- Say whether the demister operates separately or automatically.
- Note whether switching off the wall switch also cuts power to the mirror or resets its settings.
- Provide the model number and a link or copy of the manufacturer’s instructions.
- Give a clear contact route for faults rather than asking tenants to remove or open the mirror.
Where possible, demonstrate the controls at check-in. A quick, friendly explanation is often more effective than leaving a leaflet in a drawer. If the tenant is not present, put a short note in the welcome information and, with their agreement, consider a discreet label near the control. Avoid adding stickers directly to a mirror surface unless the manufacturer says they are suitable.
Write instructions that match the actual mirror
Don’t rely on generic instructions if the control layout differs from the manual example. For instance, “tap the lower-right button once to turn on the light” is more useful than “operate the touch sensor”. If there are several settings, list the steps in the order a tenant will use them. Keep the note to the fitted model, and remove old instructions if the mirror is replaced.
Also explain what is not a fault. A touch control may need a brief press, a demister may take time to clear condensation, and some models remember their last setting while others do not. Confirm these behaviours from the manufacturer’s instructions rather than guessing.
Coordinate the job to avoid scope creep
For a straightforward refresh, agree the scope before the fitter or electrician arrives. Confirm the mirror dimensions, location, control preference, electrical connection and who is responsible for making good. If the existing wall or wiring presents an unexpected issue, ask for the options and cost before authorising additional work.
This helps protect the original plan: improve the mirror lighting while keeping the bathroom layout intact. Moving a basin, relocating plumbing or replacing tiles may be justified by the condition of the room, but those decisions should be made on their own merits—not added automatically to a mirror installation.
For landlords reviewing the wider economics of property improvements, PropertyData provides resources that can help inform decisions about rental property. Use market information as context, alongside the bathroom’s condition, likely tenant needs and your maintenance budget; it is not a substitute for inspecting the property or pricing the actual work.
A day-one checklist for landlords
- Choose a mirror size that suits the basin and wall, and verify it with measurements.
- Use a paper outline to check position before drilling or disturbing tiles.
- Prioritise useful, reliable mirror lighting over a long list of little-used features.
- Keep the existing bathroom layout where it works to limit plumbing and tile scope creep.
- Have the electrical installation assessed and completed by a suitably qualified professional.
- Test every control after installation, including any dimmer or demister.
- Give tenants concise, model-specific instructions and demonstrate the controls at handover.
A tenant should not need to solve a puzzle to use the bathroom mirror. Keep the controls intuitive, choose features with https://propertydata.co.uk/resources/bathroom-upgrades-without-a-full-renovation a clear purpose and explain the essentials before the first morning rush. In many properties, a carefully positioned mirror with effective lighting and straightforward handover notes will make a bigger difference than a full bathroom overhaul.
Sponsored content note: This article includes sponsored content. Product and resource mentions are provided for consideration; landlords should confirm suitability, specifications and installation requirements for their own property.